Holding On – Antony Alexander

I got super busy, and didn’t do any free mixes for a while, and then this song came along and sparked my interest. I thought this would be a fun project to try, as it’s very rare that I get a chance to mix any type of EDM. Most DJ/producer types who create EDM usually mix their own music, especially since they are crafting sounds and effects as they are working on the song. Antony had a pretty decent mix to begin with, which he thought was maybe 80 to 90 percent “there”, but was having trouble getting it polished up to what he felt was 100%. Also, he stated he would rather spend his time writing music than mixing and mastering.

Another interesting thing about this song, which was also one of the main challenges I faced in the mix, was that the vocals were all vocal samples from a loop/sample company, and were essentially “pre-mixed”, with some vocal layers and harmonies already mixed into the samples. That meant I couldn’t split out those parts and work with them separately. Also, there was quite a bit of pitch-shift and time stretch artifacts from matching pitch & tempo of the vocals to the tracks. But, given the style, and the fullness of the tracks, it seemed to work out OK anyway. Antony usually does instrumental music, so this was one of his first attempts at doing a song with vocals.

Antony had sent the tracks out to a couple of other mixing engineers to see if they could get the mix the rest of the way to where he wanted it, and he was still working with one of them on revisions at the time I decided to take it on as a free mix. However, part of my conditions of doing a free mix is that I wasn’t going to try to recreate his mix. I wanted to start clean and see what I would come up with, knowing that it would most likely be different than what Antony did on his own, and it could be a challenge for Antony to accept a different sounding mix when he is already so used to hearing his own mix (a very common problem that many mixing engineers have to deal with – when artists are so used to hearing a rough mix that anything different sounds “wrong” to them). However, we both agreed that this would be a good learning experience for both of us. We were mainly curious to see if I could come up with something on my own that Antony would like as much, or possibly even better, than his own mix.

Antony did send me processed versions of his tracks, as well as “unprocessed” versions. However, the synth sounds he sent me in the “unprocessed” versions still had lots of reverb and chorus/delay on them (from the synth presets). So, I asked him to turn off all those type of effects from the sounds and send me really “dry” versions of the tracks to work with. That sparked his curiosity a bit more, because, evidently, the other mixing engineers he hired never asked for versions without the reverb. I personally find that most synth patches have way too much reverb and other time based effects on them to try to make them sound good on their own. But, when you start layering/stacking multiple synth sounds in a song, all of a sudden your mix is getting flooded by too much reverb. One of the things Antony wasn’t happy with in his own mix was he felt the mid-range was maybe a bit too muddy. Too much reverb on everything can definitely contribute to that, and so I wanted to start with completely dry tracks, as much as possible, and use reverb sparingly.

The other thing I thought could improve with the clarity and punch of the mix was to get rid of the ducking/pumping/sidechain effect that Antony had on all of the synth tracks. Listening to his processed versions of the main rhythm synths, I found that the timed pumping effect was killing much of the attack/bit of those synths, which was then being further muddied by too much reverb/delay. Similarly, I felt the drums and bass needed to be more up front, and much more clean as well (less reverb), to help drive the song, especially for EDM styles of music. He had what I felt was a bit too much reverb on the drums (particularly the snare) and bass. I almost never use any reverb on bass synth/guitar and rarely on kick drums either.

The good thing is that with electronic music based on synths and samples, most of the sounds don’t really need “fixing”, so I used very little EQ throughout the mix. A touch of air here and there, and some filtering of lows from instruments to make more room for bass and kick drum, and then a bit low end enhancement on kick and bass as well. Also, Antony had layered several tracks for some of the parts, each with their own sound, so by adjusting the blend of those different tracks, I could tailor the overall sound to what I felt worked best. So, most of my mixing was focused on enhancing the music tracks, making space for the vocals, and trying out lots of different effects on the vocals to make them work and make them a bit more interesting.

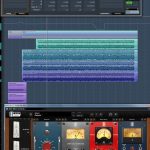
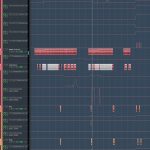
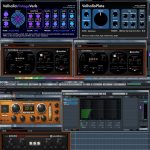
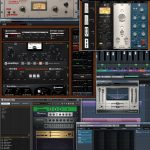
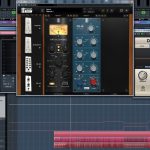
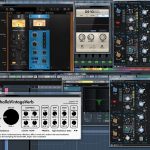
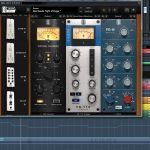
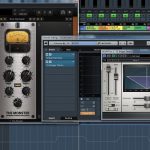
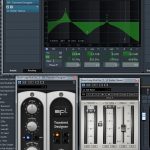
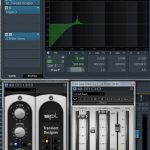
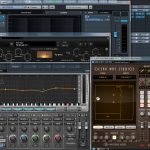
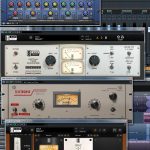
I’ll briefly mention what I did for each set of tracks, in the order of the screen grabs in the gallery at the bottom of this post.

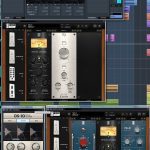
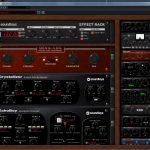
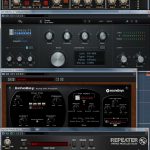
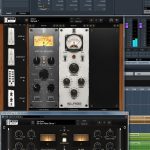
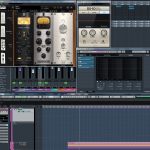
BASS – Not a whole lot needed to be done with the main bass tracks. Antony had 4 tracks that made up the main bass sound, so it was mainly finding a good blend. Inserts were fairly straight ahead. First some tape emulation with Slate’s Virtual Tape Machine (not shown), and then the Slate Virtual Mix Rack with a bit of drive from the Neve styled preamp emulation, then a bit of Neve style console channel emulation, followed by some light compression. The final tube emulation was actually added later. I had the mix already finished for a week, and then came back to it with the intention of listening with fresh ears and making minor tweaks to finish it off. In that week, Slate released the Virtual Tube Collection, and I decided to try them out on a few tracks/busses in the mix, and I liked how it enhanced the sound even more, so I kept it. Basically just added a bit more drive/grit to help the bass cut through even more and fill it out even more.

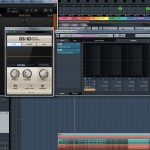
Kick and Snare – These were also fairly easy to work with, as they sounded pretty good to begin with. Kick was easiest with only Virtual Channel and then the “Earth” AirEQ. I used the resonant low cut of the Earth EQ to give the kick a bit more low end punch, along with a bit of the wider Earth boost. For the Snare, I used the Addictive Drums DS-10 Drum Shaper to give the snare some more attack, but to also pull out quite a bit of the release (which was mostly some built-in reverb on the sample that I was trying to reduce to make the snare punch a bit more). Again, some Neve style preamp emulation for a little bit of drive, then the Virtual Channel on the Trident style emulation, followed by just a small amount of EQ to cut a touch of low end from the snare and add just a bit more bit in the upper mids and high frequencies.

Drum Buss – All of the drum tracks go through a group buss before being sent to the master buss. This Drum Buss has some Neve style mix buss emulation, followed by “the Monster” compressor blended in at about 50% (and not too aggressive of compression), followed by the London Tube emulation (added later).

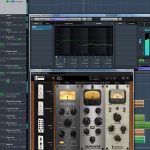
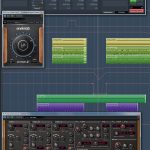
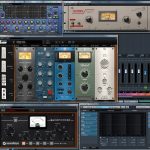
Rhythm Synths – I created a group buss for the synths which has the main rhythmic parts, and which I felt should be much tighter and clean than in Antony’s mix. Again, there were several tracks layered to create this sound (another reason for using a group buss, instead of putting inserts on every sound individually), so I mainly shaped the sound by the blend of the different layers. The amount of processing is fairly subtle again. A bit of tape emulation and console emulation, some very light compression, a bit of stereo widening, and then the (added later) tube emulation plugin. Instead of putting a “pumper” style plugin on this track, as Antony had originally done, I used the Waves API 2500 compressor emulation and sidechained it to the kick and snare drums, so that the rhythm synths would be ducked just slightly for every kick and snare hit, to help the kick and snare cut through even better. Then I had a Rhy Synth FX channel set up as effects send/return with a SoundToys effects rack. Instead of the big reverbs that were originally on the rhythm synths, I used a bit of Crystallizer and then EchoBoy with 1/8th note delay with the “verbed” style (to diffuse the echoes a bit).. all that with a bit of drive from the Devil-Loc mixed in. This whole FX chain was mixed subtly in with the dry rhythm synths to just give them a bit of space, while allowing them to still remain up front and punchy. There is also the Rob Papen Predator FX, which I only used for the filter sweeps in the middle of the song. That effect was disabled until needed, and then the filter cutoff was automated to sweep down and then back up.

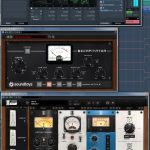
Hi Pump Synths – These were the higher frequency synth parts, again put through their own group buss, and blended to get the sound I wanted. Even less processing on these. I knew Antony wanted at least some of the pumping style effect, so these were the main synths that did that. The One Knob Pumper plugin from Waves makes doing this super easy (no sidechains needed, just syncs to the tempo of your track). Other than that, some tape emulation and another instance of the Rob Papen Predator FX for the filter sweeps. Same FX were used for this group as the Rhythm Synths.

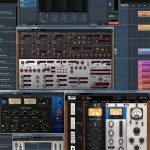
Intro Synths and LoAir – I just wanted to make the intro synths sound big and wide, but not necessarily loud. Again, this was mostly blending all the various tracks Antony had used for this section. I put some subtle flange on them for a bit of stereo motion, and added a bit of high end error to the higher synths, plus some of the usual console emulation, and some S1 Shuffler for a bit more stereo width/motion. There was also a bass synth track for the intro, which I routed to the bass group (instead of the intro synth group). I really wanted to fill out even more bottom/subs with that bass synth, so I duplicated the track and ran it through the Waves LoAir plugin for some sub harmonic synthesis. I also put the Little Labs IBP plugin on the track to get the LoAir output more in phase with the unprocessed bass synth track for maximum bass.

Pluck Arp Synths – These are the triplet feel synth parts that come in here and there throughout the song. As usually, several sounds were layered, so I blended to taste. These also got a tiny bit of the pumper effect, but not as much as the Hi Pump Synths. A little bit of compression and high frequency air EQ was all that was really needed. Then, there was a short rhythmic delay to emulate the original sound that Antony had (as I asked him to send me dry, he also took the delay out). Then just a touch of reverb set up on an FX send, plus another wider pitched delay type effect on another send that I turned on/off in certain parts of the song.

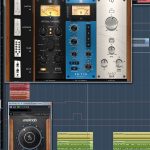
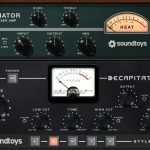
Vocals – The vocals required the most work, much of which was just trying to come up with some creative delay type effects to make things a bit more interesting. The Vocal inserts were a bit of tape emulation, followed by a bit of Decapitator for some subtle drive, then the Slate Virtual Mix Rack with console emulation, a bit of compression, and some high air lift. A bit more tube saturation was added later when I got those plugins. I used a LOT of different FX sends for the vocals, bringing them up and down with automation at different times of the mix. 4 different delays, one reverb, and a bit of micro pitch shift. In addition to the fx plugin delays, I also created my own manual delays by copying some of the audio to 3 other tracks, called “lead echoes”, “ping” and “pong”. Ping and Pong were used sparingly for a left-right ping-pong delay effect, and also had some automated EQ in a few spots. The “lead echoes” were mainly used as a feed to one of the effects sends to a plugin delay to extend the end of some phrases, as well as to create echoes for certain words.

Mix Buss – Fairly simple master mix buss processing. Some mix buss emulation, a light touch of compression, plus some master tape emulation. Later added a touch of the “Hollywood” virtual tube plugin from Slate.


Let Me Be – Mike Wyatt

FREE Mix “Winner” #2

Let Me Be by Mike Wyatt

Mike’s own short self-description:

Solo artist from London, UK. I haven’t ‘properly’ released anything as of yet but plan to be releasing my debut EP/Single in early 2017. At the moment I’ve been focusing on touring all over the UK, and even venturing further afield into Europe and even the US, playing @ The Hotel Cafe in Los Angeles a couple months back – planning to come back to the US a lot more next year.

Check Mike out at these links:

Mixing Notes

This was another song that was a lot of fun to mix, and relatively “easy” to mix since all the tracks sounded very good to begin with (nothing needed “fixing”).

What really drew me into this song was Mike’s voice. I’m not a lyric person, so I’m drawn to interesting voices, as well as melodies and the overall musical arrangement. Mike did a great job with the melody and arrangement, but his voice really stood out.  He has a VERY dynamic singing style, which is great, but also posed the biggest mixing challenge. I needed to tame those dynamics without totally killing his style and the vibe of the song.  If you look at the screen shots at the end of this post, you’ll see that I used two different compressors on his voice, as well as quite a bit of volume automation to further smooth things out.  One compressor is set to a very gentle setting, to just give a bit of overall smoothing, while the second compressor is set a bit more aggressive to really tame the parts where he gets really loud.  Then, I further smoothed things out with automation… in addition to riding the overall vocal volume as instruments came in and out and the song built up, there were several loud words that needed a bit more taming than the compression could do on its own, as well as several very soft words that I needed to jack up the volume on.  Since the song is relatively sparse as far as instrumentation goes, I didn’t need to get too extreme with the volume rides and compression to keep the vocals on top of the mix.

As far as specific processing, the inserts started with the UAD Cambridge plugin to roll off some subs from the voice, to get rid of a bit of rumble in the track as well as to tame a few plosives. That was followed by the UAD LA-2A compressor emulation, which was my gentle overall compression. After that the Slate Digital Virtual Tape Machine (not shown in the screen grab) for some subtle tape emulation. Then the Slate Virtual Mix rack, which initially just had the console emulation, the Neve EQ emulation, and the FG-116 (1176 style) compressor.  After the initial mix, Mike requested a bit more low end and body in the voice than I initially had set. So, I tweaked the Neve EQ a bit, and added the Revival plugin as well as the Earth EQ plugin, which I just used to set up a bit of a resonant LoCut filter.  After that I used the Elosis DeEsser to tame a bit of sibilance, and then just a touch of distortion to add a bit of edge and more warmth to the vocal with the SoundToys Decapitator (blended in at about 50% dry/wet).

As far as vocal effects, there is also a lot happening there as well.  It may look like a lot of effects, but there are all blended in subtly, and you can see there is a lot of automation happening to bring various effects up and down in different parts of the song.  There are two different delays. One is a short “dirty” slapback echo (which I edited to make a bit cleaner than the preset I started with) that is automated up and down in various parts of the song. The other delay is a bit longer and the return for it also has some send to the Valhalla Plate reverb to help diffuse those echoes a bit more. Both of those delays are used fairly sparingly and low for most of the mix, but then brought up to be much more audible in the quieter bridge section, for a bit of contrast (at the request of Mike).  The main reverb on the voice, which again is kept quite low for most of the mix (but brought up and down with automation) is the Valhalla Vintage Verb, using a kind of 80s smooth plate reverb emulation.  Finally, there is a bit of Microshift on the voice, but with a delay inserted before it to separate it a bit more from the dry vocal… that’s just used as a subtle thickening effect.

I had a bit of fun with the Bass on this song as well. Since there were only a couple of rhythm guitars to deal with, there was more space than usual in the mix for a nice full bass sound. Even so, the struggle is always to keep the bass audible without it getting too muddy. My favorite technique for this is to add harmonics with distortion, and this song was no different. I was going for a lot of contrast between verse and chorus in this song, and wanted the chorus to be a bit rough and edgy, so I went with more distortion that I normally would, but not to the point where you hear it as a distorted sound.  The bass actually has 2 different types of distortion happening.  If you look at the screen shot of the inserts, you’ll see a SoundToys effect rack with a Decapitator providing some subtle distortion, followed by some Microshift and a bit of ambient delay to give the bass some “air”. Although that was used as an insert, you will notice the mix levels for each of those, as well as the overall Mix setting for the mix rack, are fairly low… so that was just a very subtle bit of distortion and space that I added that was constant throughout the song.

The main bass distortion, though, is actually on an effects buss, using Native Instruments Guitar Rig 5 with one of their bass amp presets that I modified and added to to get a sound that worked in this song. That was followed by the Waves S1 to really widen that distortion out to the sides of the mix. It’s a very mid-range sound, and I automated the return on that effects send so it’s really mostly present in the loud sections, and very low in the mix everywhere else.  That’s usually the key to keep the bass at a good level throughout the mix… as the chorus kicks in with more instruments and everyone is playing louder, the bass will usually get lost in the mix. However, if you simply bring up the volume of the bass track, you will often get too much low end and mud. So, instead you need to bring out more harmonics and bite to let the bass be heard and let the brain fill in the lower frequencies (a psycho-acoustic effect… you could completely filter out the fundamental frequency and only have harmonics, and the brain will still fill in the fundamental). Usually, though, it’s a bit of both, as it was in this song… ride the bass volume a bit along with the other instruments, but also bring out the mids/harmonics/distortion to help it be heard more in the loud sections.  If you do it correctly, the majority of listeners will never notice that the tone of the bass has actually changed or that any distortion was added at all.

Drums were fun on this song as they were recorded well, with a nice sounding kit and a great drummer, so they didn’t need any fixing or triggering to make them work in the mix.  Like many of the other instruments in this song, I wanted the sound to change and get a bit more raw and edgy in the loud sections. For the drums, this was done mostly through bringing the Room mics up more in the loud sections, as well as increasing the blend of the parallel drum compression on the main drum buss by automating the Mix knob on the Slate “The Monster” compressor.  Also, I tried out a new plugin on the drums on this mix, which I really ended up liking quite a bit. Usually I will use the SPL Transient Designer plugin on kick, snare, and sometimes Toms and even the main drum buss.  This time, I tried the DS-10 Drum Shaper plugin from XLN Audio, and I really liked it. It’s similar to other transient modifier plugins, but it has slightly different settings for Kick, Snare, and Bus, with Attack and Sustain controls tailored to those uses, as well as a “Mojo” knob that did different things for each of those uses.  I ended up using it for Kick, Snare, as well as the main Drum Buss, but I also automated the controls on them, bringing the attack up and down in sections, as well as automating the Mojo control. It worked really well for this song.

Screen Shots

Days That Never Dawn – Steven James

FREE Mix “Winner” #1

Days That Never Dawn by Steven James, produced by Justin Stewart

After my busiest summer even, I finally have the time to post the mix I did for the first “winner” of my FREE Mix Submissions.

I picked this song as the first free mix selection, simply because I really like the song, especially the artist’s voice and the overall production.  I’m the kind of person who listens more to the sounds in the music (vocals, instrumentation), rather than the lyrics, and I just really liked the “sound” of this song, and especially Steve’s vocals.  They all did a great job to begin with, and the mix that Justin sent me was already pretty good to begin with.

Not to say that this mix was not a challenge. The biggest challenge was the drums, and I have to admit that I’m still not 100% happy with the sound I got from the drums (mostly the cymbals), but it’s about as good as I could do (and still pretty damn good sounding overall) with what I was given to work with.  The issue was that the song was produced in Reason (which I love, BTW), and the drums were from one of the loop instruments. So when the tracks were split out, as I requested, I got loop slices for each track (kick, snare, toms, overheads). The producer and artist both wanted really loud kick and snare, especially in the heavy sections. But, if I bumped them up too much, then you began to hear the cymbals come up briefly with the slice and then cut out abruptly at the end of the slice, which sounded very unnatural. I didn’t want to bring up the overhead slices any more than I needed to, because they were a bit phasey sounding in the heavy sections, and just took up too much space in the mix. In the end, after a few back and forth revisions, I used quite a bit of SPL Transient designer on the kick and snare channels that are present in the loud sections (there are actually two sets of drum loops throughout the song), some generous EQ, and then used a trigger on the snare channel to layer in another sampled snare so I could bring it up even louder in the mix without bringing up the level of the hat & cymbal bleed.  Then, to combat some of the phasey/splashy sound of the cymbals in the loud section, I put an EQ on the master drum buss channel and dialed in the changes I wanted for those loud sections, and then just automated turning on/off that EQ so it was only on for those loud sections. I also used the UAD Ocean Way plugin to put the drums in a nice sounding room, blended in very subtly. Screen shots below:

The vocals were probably my favorite part of this song, and Steven has such a great voice, so it was a real joy to mix!  Justin really like what I did with his vocals, and although there was a lot going on with the vocals in the mix, nothing was very heavy handed since the vocals sounded great to begin with. If you take a look at the screen shot of the lead vocal inserts below, there was very little EQ happening.  The UAD Cambridge is there just to roll off the subs to get rid of any rumble and reduce the effect of any plosives (which, I don’t think there were any). The only other “EQ” was from the Slate Custom Series Lift module, which was used to add some high-frequency air to the voice. Otherwise, the vocal is shaped with the very subtle Slate Virtual Tape and Virtual Console emulations, and a bit of compression with the UAD LA-2A Gray plugin.

The “magic” of the lead vocal comes from the various effects I used, with lots of automation bringing different effects in and out, or up and down in level, as desired. Part of the main vocal sound is a huge rack of effects in the SoundToys Effects Rack, which was blended in via an FX Send/Return, and brought up & down at various points in the mix. It’s a bit of a Rock Vocal preset from Soundtoys, that I modified and added to. Starts with a couple of subtle distortion effects at different mix/blend levels, then a couple of short delays, followed by the Microshift (blended fairly low).  That particular effect probably has more to do with the overall sound of the vocal than the actual inserts on the lead vocal track.

For time based effects, I had a 1/4 note delay and a 1/2 note delay set up, both using Soundtoys Echoboy again, and then a nice warm chamber reverb using the Waves H-Reverb.  The longer 1/2 note echos were triggered in only a few select spots in the song. The 1/4 note echoes were also automated in on only a few select spots in the beginning of the song, but then brought in at a lower level overall starting with the first chorus, to kind of fill out the vocals a bit more, but still automated to produce some louder echoes in a few more spots throughout the song. The return from the 1/4 and 1/2 note echoes also got partially sent to the chamber reverb as well to wash them out in the background a bit more.

Everything else was fairly “standard”, and, if I have more time, I may come back to this and add more notes and screen shots for the rest of the tracks. But, the above items were the most noteworthy.

Now that my son is going back to school very soon, I hope to get into a regular schedule and do about one free mix about every 2 months, depending on how fast they go and how busy I am with paying gigs. So, keep submitting your songs for a free mix!